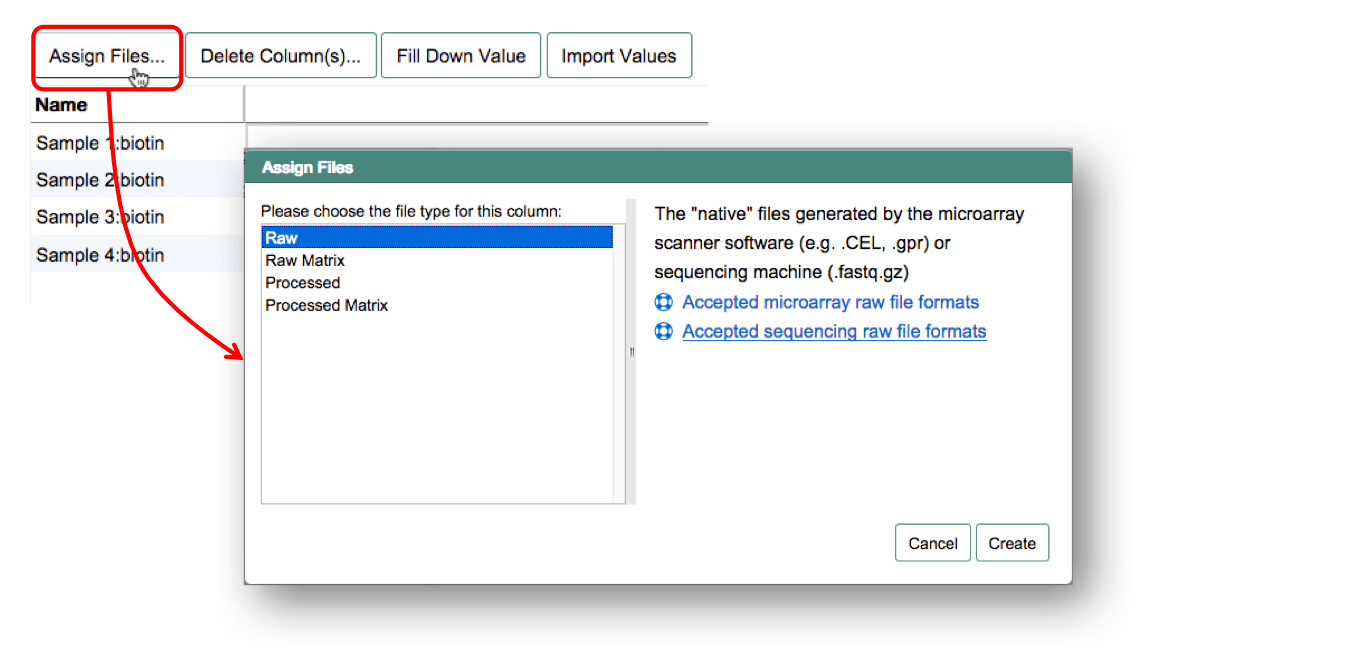
Assign Files to Samples
A submission isn't complete without knowing which data file belongs to which sample.
Four different types of data files are distinguished based on whether they contain data for a single sample or for multiple samples (matrix) and whether they have been manipulated (processed) or not (raw).
In order to assign the files to the samples, you must first choose the category of file that you have. Then select the respective file name from the dropdown menu for each sample. Repeat this process for each data type you want to include in the submission. You can use the functions Fill Down Value and Import Values to speed up the process and minimise mistakes. Files that are not assigned to any samples are not included in the submission.
Example cases for different experiment/data types:
Assign Raw Data Files
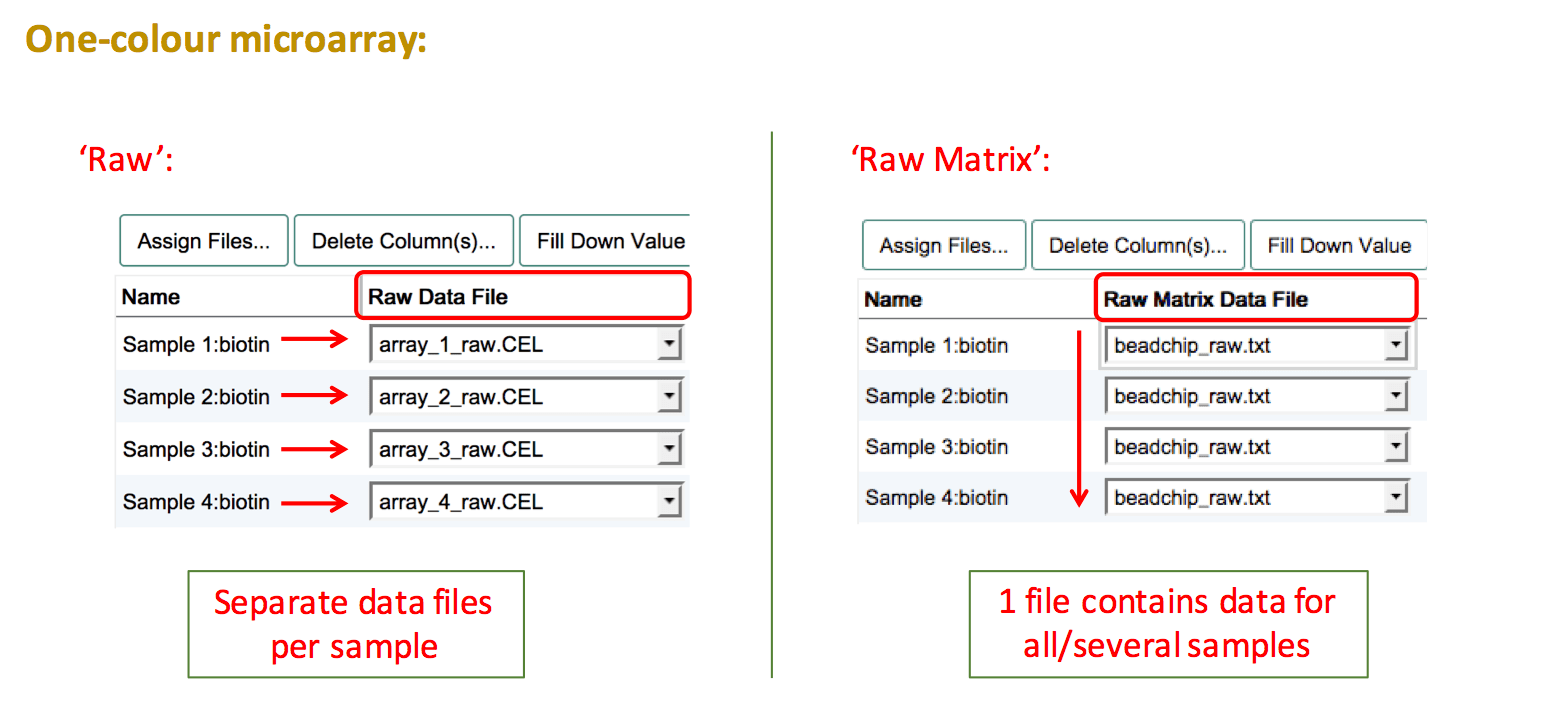
One-colour microarray experiment
For one-colour microarray experiments the raw output files can be either individual files per sample or a matrix file (e.g. Illumina arrays).
If you have individual files per sample, create a "Raw Data File" column and assign each sample to the respective file. For raw data matrices, all samples need to be linked to the same data file. To do so, create a "Raw Matrix Data File" column and select the name of the matrix file. Use Fill Down Value to propagate the file name to all samples.
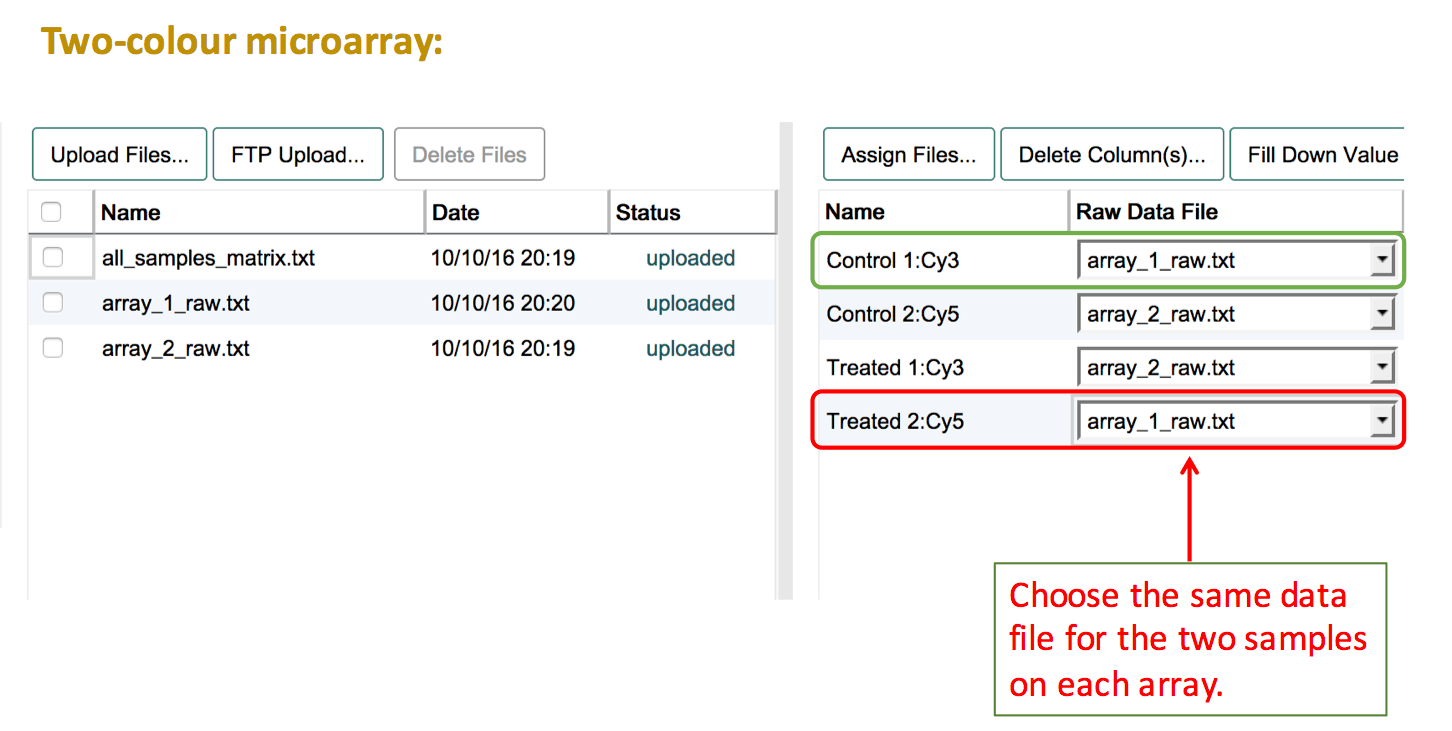
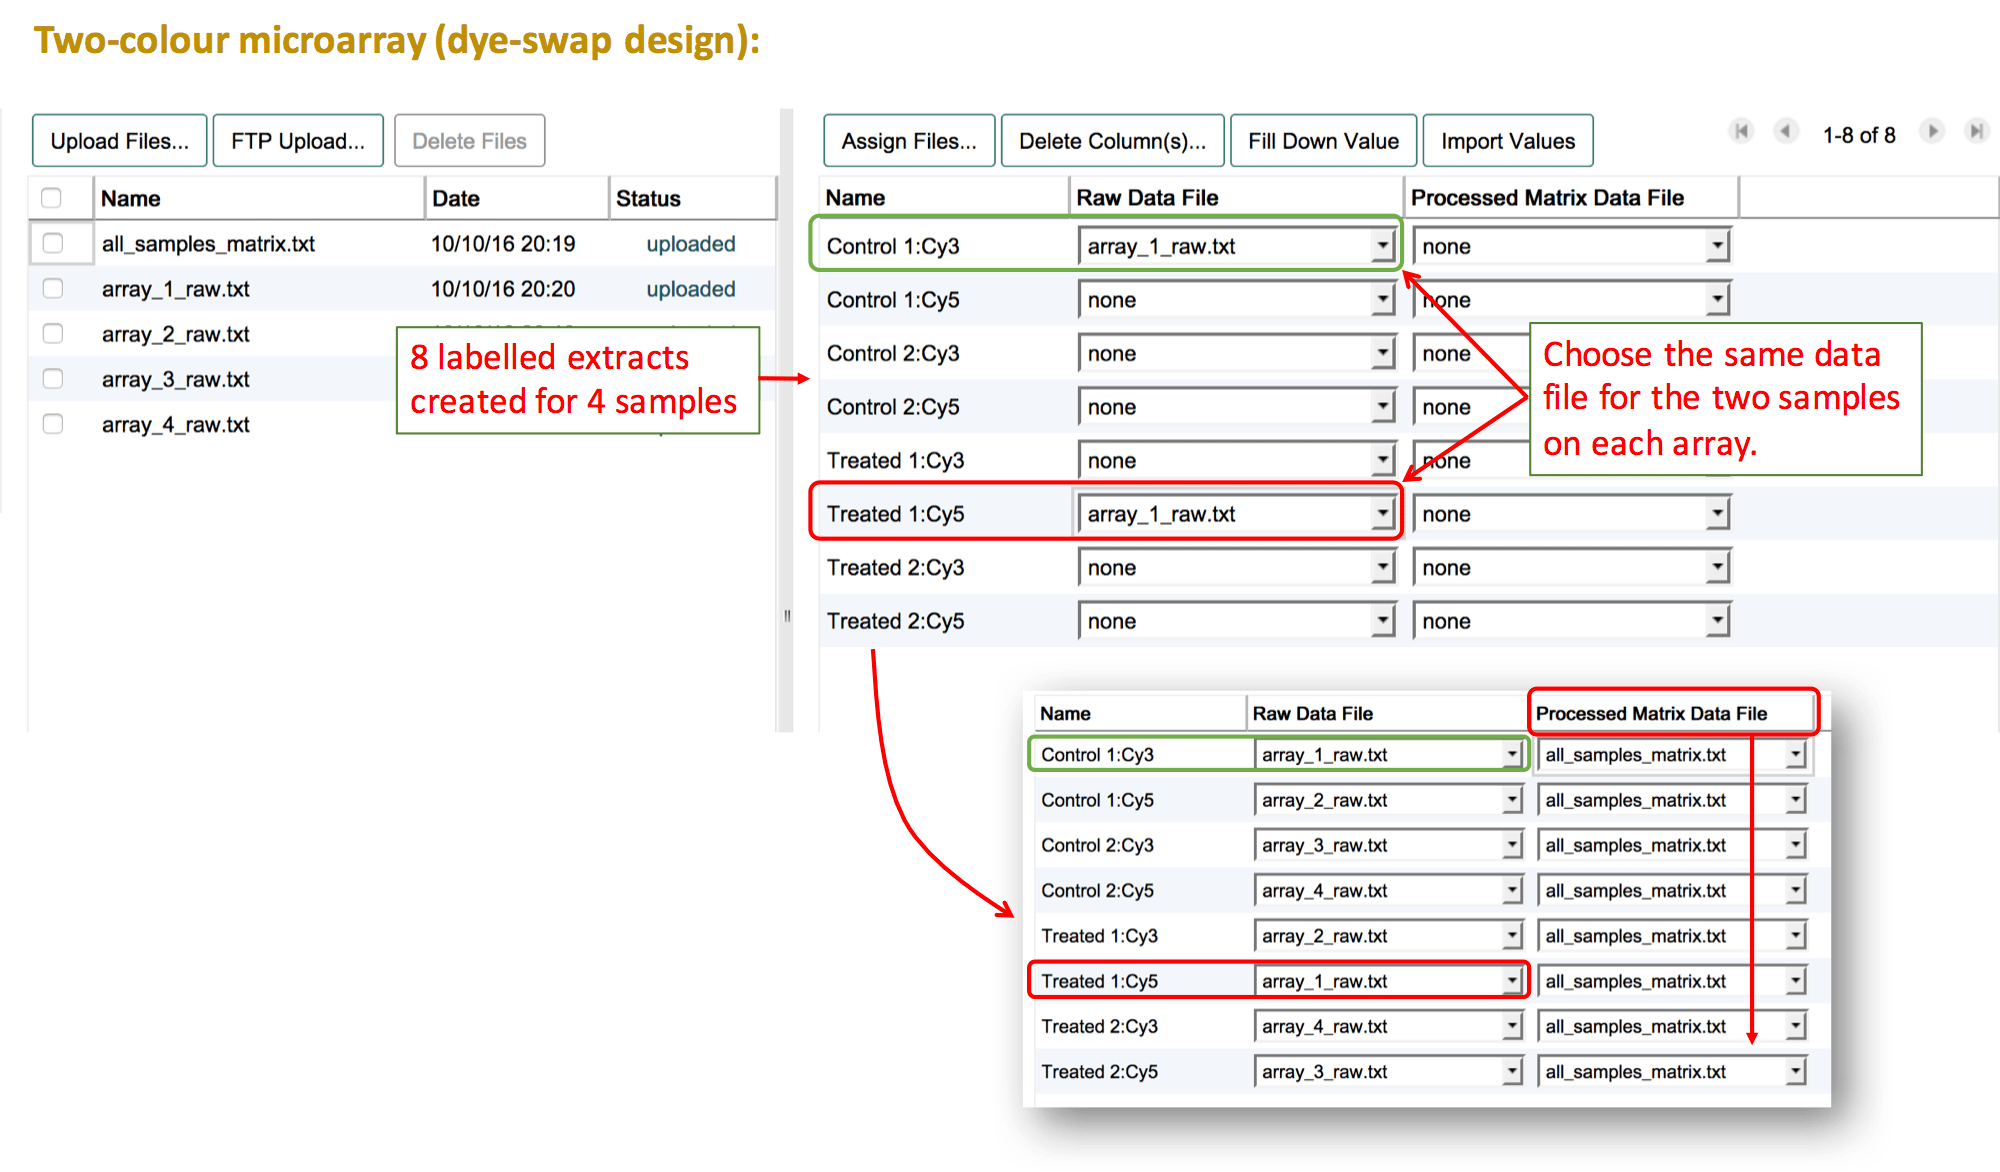
Two-colour microarray experiment
Two-colour microarray experiments need extra attention when assigning data files to samples. The basic assumption is that the data for both channels are stored in the same file (2 samples -> 1 hybridisation -> 1 file). See the two-colour microarrays help page for more details and what to do if your files don't comply with this rule.
The basic steps are:
- Before assigning data files make sure to select the correct label for each of your samples. The panel on the right presents a list of the labeled extracts (Sample:Label combinations) that have been created.
- Press
Assign Files...and create a "Raw Data File" column. - Select the same file name for the two labelled extracts that belong to the same hybridisation. This should always be one Cy3-labelled extract and one Cy5-labelled extract that are connected via the same file name.
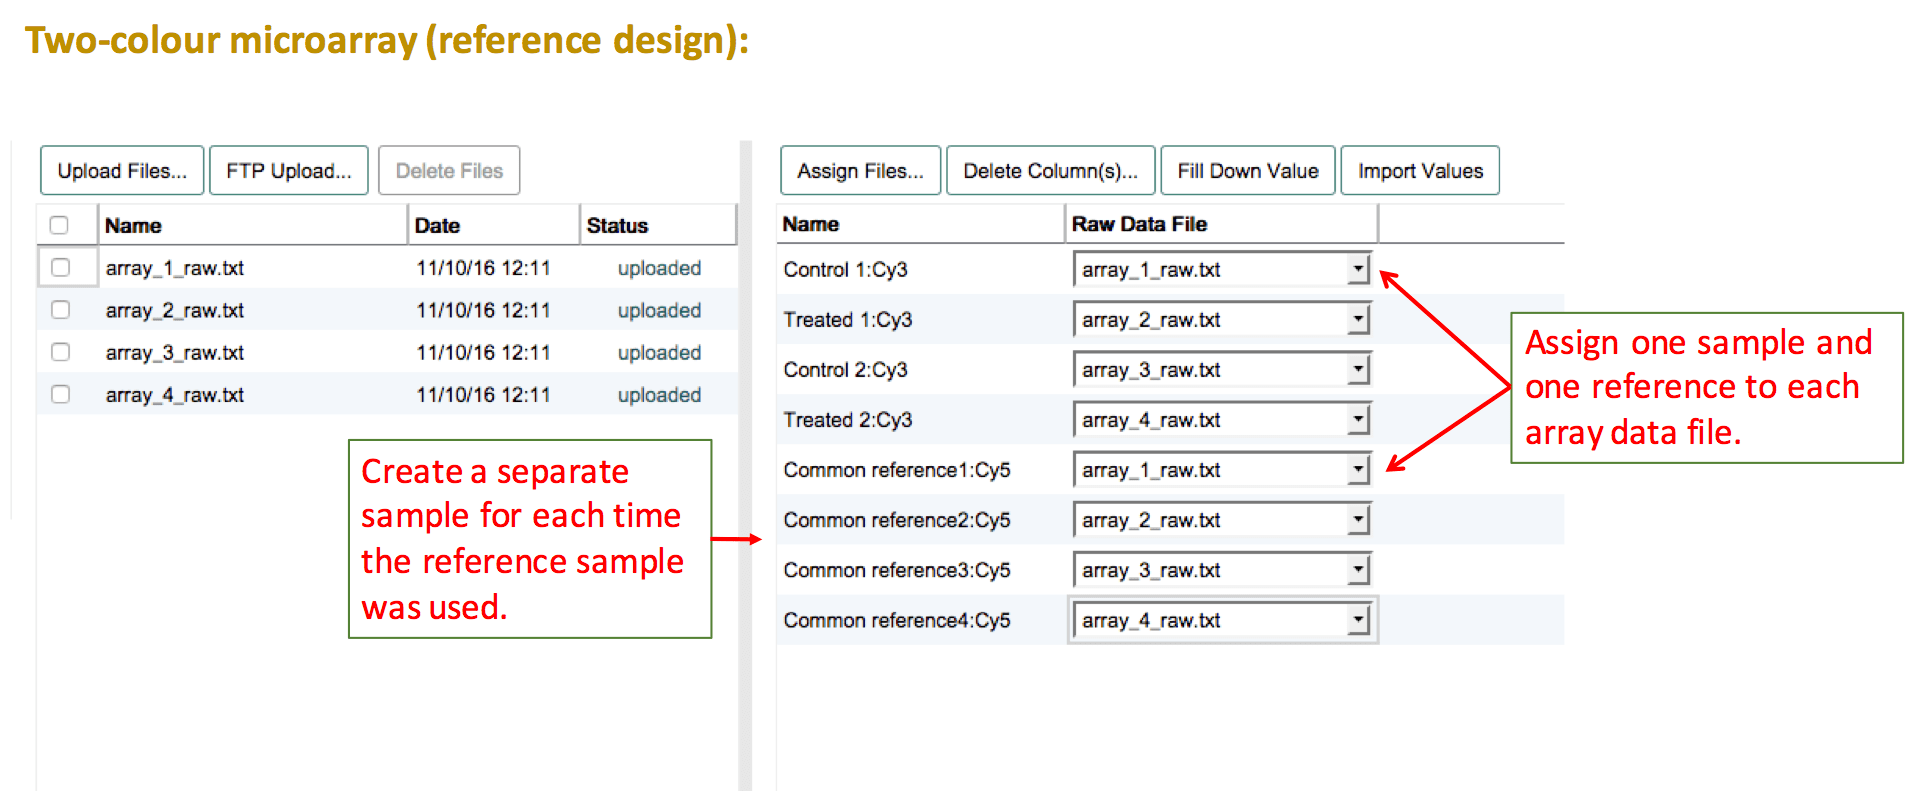
For two-colour microarray experiments that use a common reference sample, the first step is to create a "reference sample" in the sample annotation table. It is not possible to link several files to the same sample. Therefore, even though the same biological material may have been used on each array, the reference sample needs to be duplicated for as many times as it was used on an array. Then the file assignment can be done as explained above, selecting the test sample and one of the reference samples for each file. If the numbering of the reference sample should be removed (because the same reference material was used), leave a comment about this in the feedback dialogue after submission, and a curator will correct this before loading the experiment into ArrayExpress.
Another example for a dye-swap design. When you have tested each sample twice (once with each label), you don't need to create a separate row in the sample annotation. Simply, leave both labels selected for each sample in the "Create labeled extracts and assign labels". The list of labelled extracts should now show each sample twice, each time with the respective label. Follow the same instruction as above to link the data files with the labelled extracts.
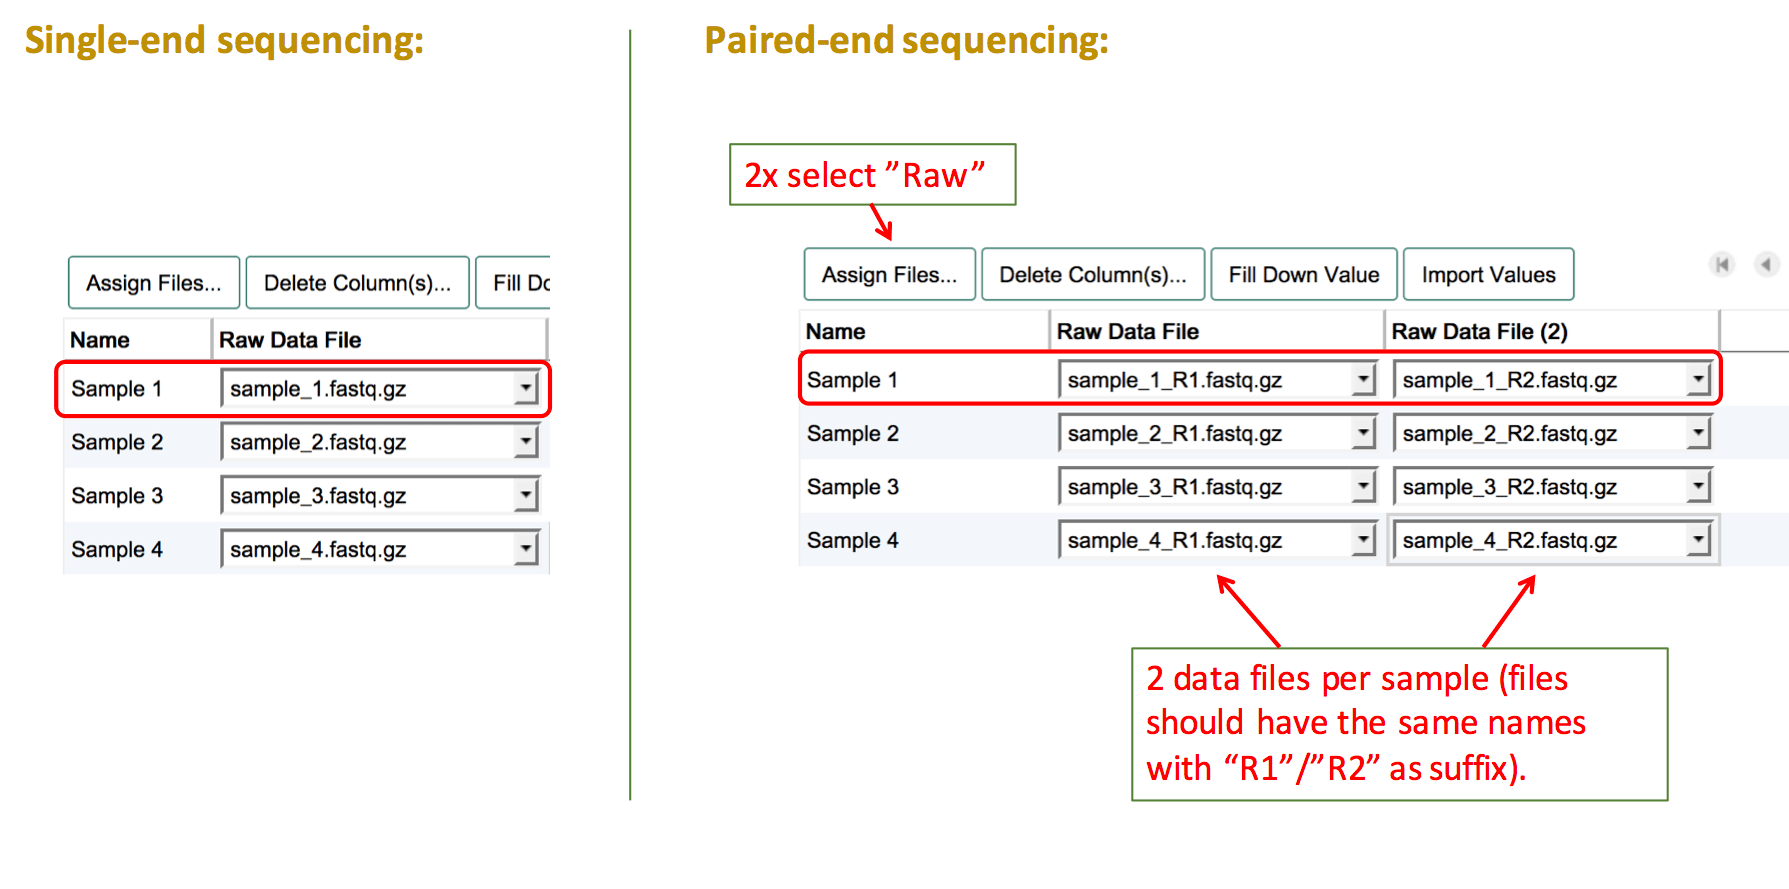
Sequencing experiment
Sequencing experiments should contain indivdual sequencing raw read files for each sample. To assign raw sequencing files, select the file type "Raw". Then fill the columns with the names of the corresponding file for each sample.
For experiments using paired-end sequencing, two individual raw read files should be provided. To assign both files to one sample, create two "Raw" data file columns by clicking on Assign Files... twice. Then link the two corresponding sequencing files to each sample.
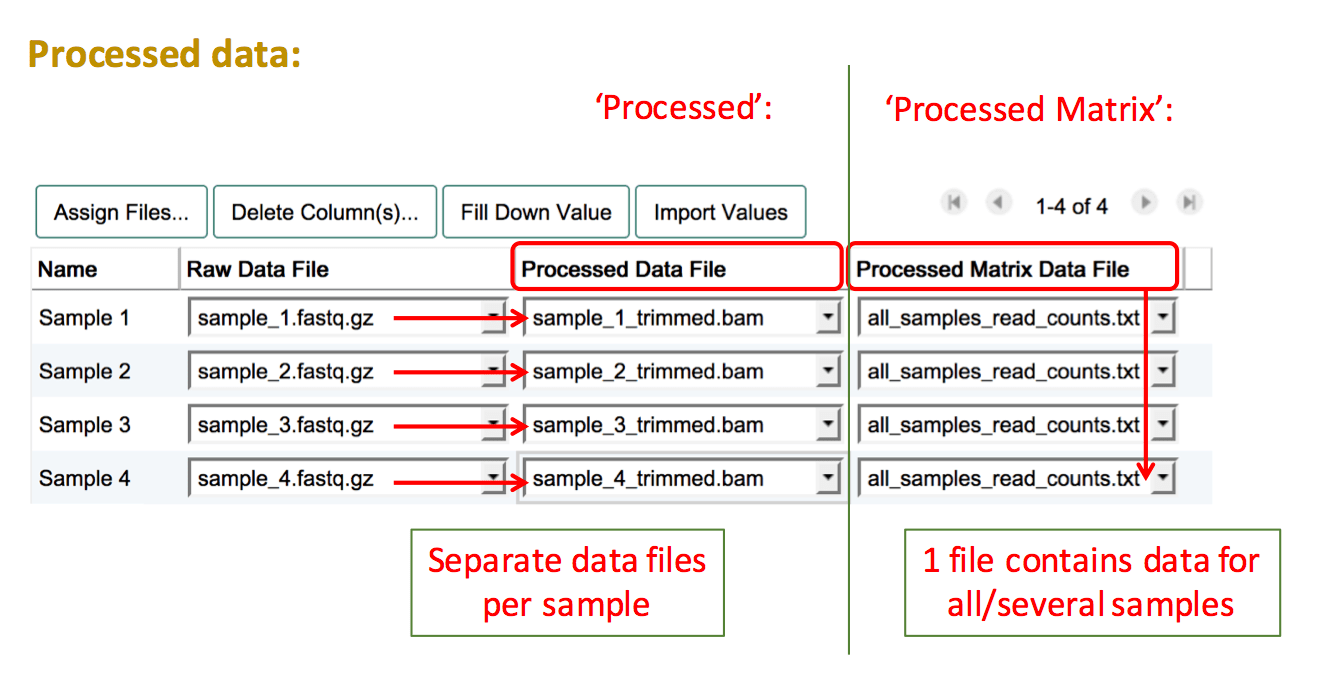
Assign Processed Data Files
"Processed" data refers to all data files and formats that are derived from the raw files and have been manipulated in any way (e.g. background correction, log2 transformation, normalisation, read trimming).
To add processed data files, create another column by pressing Assign Files.... Then select "Processed" if you have a separate file for each sample, or "Processed Matrix" if you have a file which contains processed data for more than one sample. Proceed to select the filenames of your uploaded processed data files for the relevant sample(s). If you have more than one processed data type, repeat the process to add more data columns.
If you would like to include any other additional data types, please upload the files and leave a note in the feedback dialogue after submission, and a curator will add the files as supplement to the submission.
Technical Replicates
Sequencing experiment
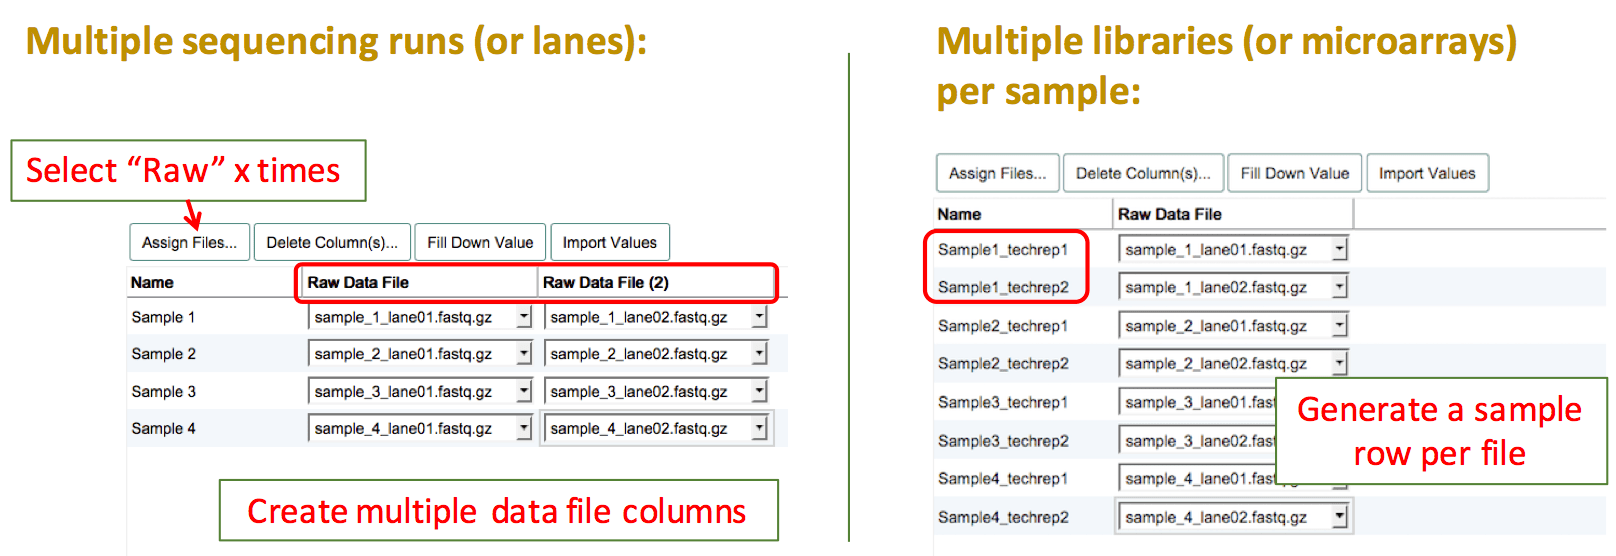
There are two different types of technical replicates:
- Multiple libraries prepared from the same sample material (RNA/DNA extract)
In this case, please create multiple sample rows and clearly name them with a suffix like "_library1", "_library2". This way you can also assign different library specifications to each library. - The same sequencing library run on multiple lanes of a flow cell (this also includes multiple sequencing runs of the same library e.g. at different time points)
In this case, create as many "Raw Data File" columns as you have files per sample/library, to be able to assign all files to the same sample/library.
Microarray experiment
If the same biological sample was tested on two different arrays, please create separate sample rows and assign one file to each of these technical replicates. Name your replicate samples with the same prefix and then add e.g. "_techrep1"/"_techrep2".